FaxPress Premier WebHelp: Admin Guide > Contacts and Phone Books
|
Contacts and Phone Books
Creating Corporate Phone Books
FaxPress Premier offers two different types of Corporate Phone Books: FaxPress Phone Books and External ODBC Database Phone Books. Corporate Phone books can be configured by users with Administrator or operator privileges.
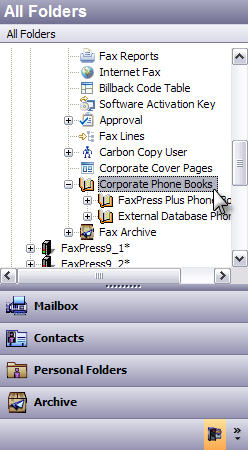
The proprietary FaxPress Phone Books is actually one phone book with different groups within it. The <ALL> group contains all the other groups.
Premier supports the creating of multiple External Database Phone Books, pointing at different sources.
For information on setting up and using Personal Phone Books, see Creating Personal Phone Book.
Creating FaxPress Premier Phone Books
To create Corporate FaxPress Phone Books, follow these steps:
Creating a Group
To create a new phone book group, follow these steps:
|
1.
|
Log into your FaxPress Premier server with Administrator privileges and select the Administration folder view. |
|
2.
|
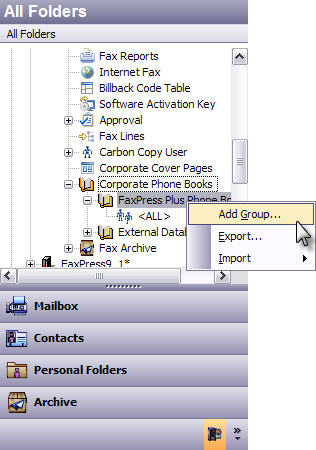
Expand the Corporate Phone Books. Right-click on FaxPress Phone Books. Select Add Group. |
|
3.
|
The Add Group screen will be displayed. Group names can be used when sending faxes to broadcast your fax to any number of recipients. |

|
4.
|
Enter the name you want to give the new phone book in the Group Name text box. |
|
5.
|
Click OK to accept the values. A new folder will now be visible under the Personal Phone Books folder.You now can add individual members to your group. |
|
6.
|
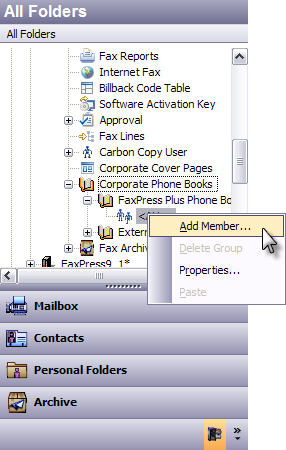
To add members to the group, right click on the Group name and select Add Member. |
|
7.
|
The Add Member screen will be displayed. |

|
8.
|
Fill in the Add Member screen with the appropriate information. |
You can continue adding individual members, or you can import members into your phone book from a previously created phone book file. To import members continue to the next section, Import FaxPress Phone Books.
Importing a Phone Book File
You can import four types of phone book files:
|
■
|
Standard Comma Delimited Files (*.csv) |
|
■
|
Custom Comma Delimited Files (*.csv) |
|
■
|
ExportPH Files (*.*)— This is a FaxPress 3.x exported phone book |
To import a phone book file:
|
1.
|
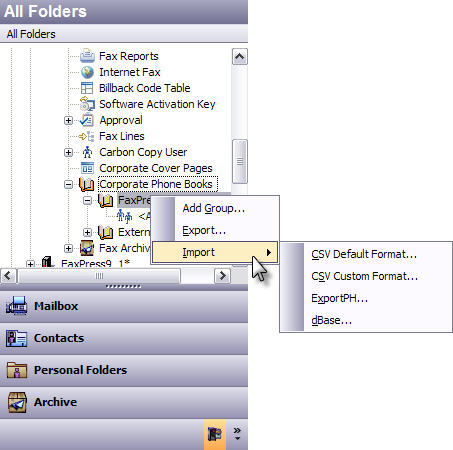
Right click the FaxPress Phone Book folder and select Import and the file format (i.e., CSV Default Format, CSV Custom Format, ExportPH, dBase) from the context menu. |
|
2.
|
If you are importing a CSV default format file, a dBase file, or a ExportPH file, an Open import file screen will provide you the means for locating the file. |
|
a.
|
If you are importing a dBase file, after you use the Open import file screen to locate your dBase file, the Convert dBase to Phone Book dialog box will be displayed. Use this dialog box to map the dBase fields (in Fields) to your FaxPress fields (in Target Phone Book Fields). |
|
b.
|
Use the Add Link button to establish a link between the fields selected from the source dBase file and the target phone book (see above). The link is shown in the View list. Click on this button to remove selected item from the View list. |
|
c.
|
Click on the Convert button to start the conversion process. |
|
3.
|
If you are importing a CSV custom format file, the Import File Field Assignment dialog box will be displayed before the Open import file screen. In the Name section, select the appropriate method of importing the contact's name, depending on its format in the original database. |
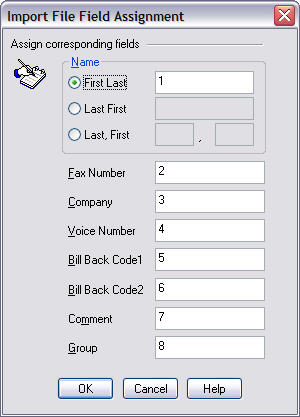
The default values in this dialog box are 1 through 7 respectively. Re-sequence the fields to correspond to your custom file. If you do not have one of the default fields in your custom file, leave the field blank. In the figure above, the custom file does not have fields for Voice number, Comment or Group.
|
4.
|
After locating the file, click OK to import the file. The phone book number will all be located in the folder ALL (if no Group is defined in your imported file) or the Group name (defined in the import file) folder under the FaxPress Phone Book folder. |
Exporting FaxPress Premier Phone Books
To export a phonebook, follow these steps:
|
1.
|
Open FaxPress Plus and login to the Premier with Administrator or operator privileges. |
|
2.
|
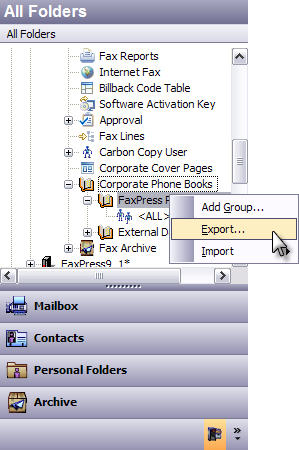
Expand the Administration branch, expand the Corporate Phone Books folder, and right click on FaxPress Phone Books. |
|
3.
|
Select Export from the context menu. |
|
4.
|
The SaveAs dialog box will be displayed. |
|
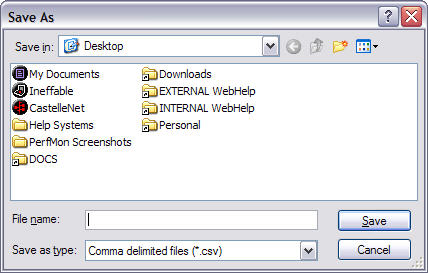
5.
|
Navigate to a directory, specify a name, and save the file. The file will be exported as a comma delimited file. |
Accessing an External ODBC Database Phone Book
To access an external ODBC database and use it as your phone book, follow these steps:
|
2.
|
Expand the Administration branch and click on Corporate Phone Books. |
|
3.
|
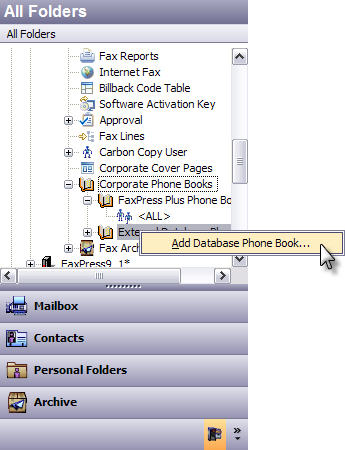
Right click on External Database Phone Books and select Add Database Phone Book from the context menu. |
|
4.
|
The Database Phone Book dialog box is displayed. You can create a new phone book, give it a name and select the type and location of the database from this screen. |

|
5.
|
To connect to either a Microsoft Access database or an Excel, FoxPro or dBase database, enter or browse for a file name and path. If the database file is password protected, you need to provide this password. The supported ISAM file formats are: |
|
■
|
dBase versions III, IV, or V |
|
■
|
Excel versions 3.0, 4.0, 5.0 and 8.0 |
|
■
|
FoxPro 2.0, 2.5, 3.0 and DBC |
|
6.
|
To connect to a DBMS server such as Microsoft SQL server, select an existing or create a new connection string. This is done by clicking the ‘select’ button. The local ODBC user interface comes up to allow you to select the “ODBC data source name”. |
Create Phone Book Views
To use an external database as a phone book, you must first link to the specified database and then create associations or mapping between the database fields (or columns) and the Phone book elements. The process of creating phone book views facilitates the mapping process.
|
1.
|
Right click on the new database phone book and select Add View from the context menu. |
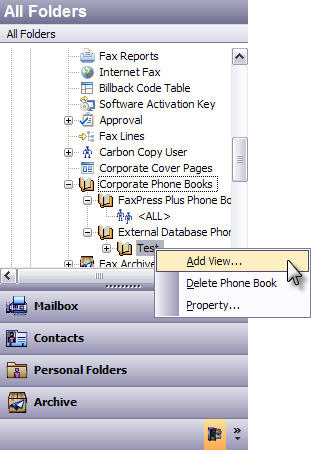
The Database Phone Book dialog box will be displayed.
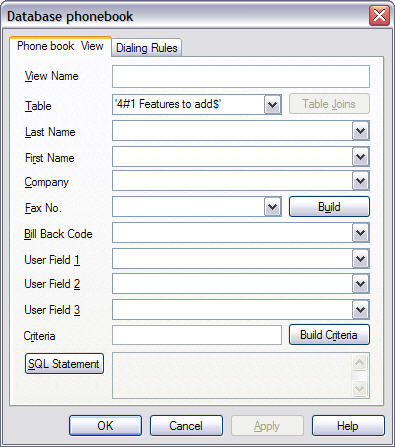
From the Database Phone Book dialog box you can select any table and column in your phone book database and associate it with a phone book field.
|
2.
|
The Phone Book View tab will be activated by default. Use this tab to map the FaxPress phone book fields to the external phone book. The following FaxPress fields can be mapped into fields in the database phone book: |
|
■
|
Table — The define tables in your database can be selected from the drop down list. |
|
■
|
First Name and/or Last Name— To associate the fax recipient with the field or column in your table, select the appropriate column name from the drop down list. As in the example screen above, we have associated a LastName column in the phone book with the ContactName column in the Customers table. |
If your database table contains separate fields for country code, area code and number you will need to select those separately, by clicking the Build button to separately select each of those fields and put them together to generate the fax number.
|
■
|
Company — Map this phone book field to the equivalent CompanyName column in your database table. This is an optional field. |
|
■
|
Bill Back Code— Map this phone book field to the equivalent BillBackCode column in your database table. This is an optional field. |
|
3.
|
To map the database table to your view, select one of the database tables in the scroll down list for Table. |
|
4.
|
Once you select the table, you will be able to select the table fields from the drop-down list boxes next to each of the FaxPress phone book fields. |
If your database table does not contain a separate fields for first and last name, just map one of them (either first or last name) to the full name, as shown above.
|
5.
|
You can define a filter on the database by clicking on the Build Criteria button. The Criteria dialog box will be displayed. |
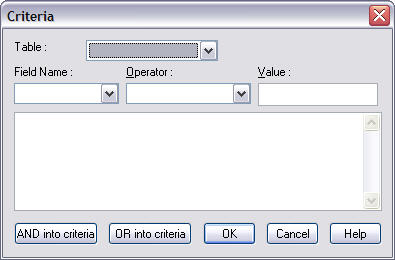
As an example, you can set the criteria for all supplier in the United States by selecting “Country” for Field Name, “equals” for Operator, and “USA” for Value.
You can use either ‘Logical AND’ or ‘Logical OR’ to define the logical relationship between those conditions. The ‘Operator’ provides a rich variety of conditions such as: Begins with, Ends with, contains, does not contain etc.
|
6.
|
You can view the SQL statement that is generated as a result of the mapping and the criteria that you have set by clicking on the SQL Statement button. This is an informational field only. |
|
7.
|
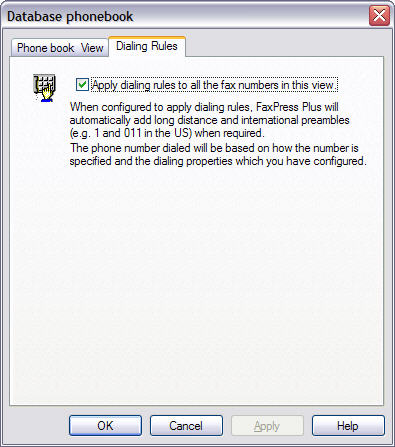
Click OK when you are finished filling out the Phone Book View tab and select the Dialing Rules tab. |
|
8.
|
To apply the dialing rules that have been defined in Server Properties for every fax number in this view, click the box. See Dialing Properties. |
|
9.
|
Click OK to finish creating your view. The new view will be located under the phone book folder. |
Creating Table Joins
To access multiple tables from one phonebook view, you must include a new table in your view and define a join or an association between a column in one table with a column in the new table. You must define a join for each of the tables from which you want to include data for your phone book.
can include data from any number of tables, but at least one join has to be defined.
|
1.
|
Right click on any phone book view and select Properties from the context menu. The Phone Book View tab will be activated. |

|
2.
|
Select the table you want to join by finding it in the Table scroll down list. In the above screen the Employees table was added to the Contacts view. |
|
3.
|
Go to the FaxPress field name that you want to map to this Table, and find the new table field. In our example, the Employee.FirstName and Employee.LastName were mapped to the appropriate FaxPress fields. As soon as you enter a field from the new table the Table Joins button will now be activated. |
|
4.
|
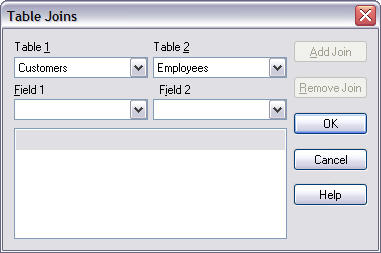
Click on the Table Joins button. The Table Joins dialog box will be displayed. |
|
5.
|
Select the tables you want to join in Table 1 and Table 2. |
|
6.
|
Select the field in Table 1 to join to the field in Table 2 in Field 1 and Field 2. |
|
7.
|
Click the Add Join button. The view now includes data from two different tables. |
Building Fax Numbers
If your database table contains separate fields for country code, area code and number you will need to add each of those fields together to create the fax phone number.
|
1.
|
Right click on any phone book view and select Properties from the context menu. The Phone Book View tab will be activated. |
|
2.
|
Click the Build button (to the right of Fax Number). The Build Fax Number dialog box will be displayed. |

|
3.
|
To have FaxPress automatically build a fax number, you must map the following FaxPress fields to the fields in your database table. |
|
■
|
Table— The table that contains the phone number fields |
|
■
|
Country Code— The country code to include with the fax number |
|
■
|
Area Code— The area code to include with the fax number. |
|
■
|
Fax Number— The base number to include with the fax number. |
FaxPress will now automatically generate the your fax numbers.
Making Views Visible
To provide your users with access to the corporate phone book views you created, assure the following requirements are met:
|
1.
|
ODBC drivers should be installed and properly configured on your users workstations. We recommend that you upgrade the ODBC drivers to the latest version 3.5 which we ship on the FaxPress CD (under Microsoft/ODBC directory) |
|
2.
|
Make sure that the users have access to the specific databases. |
|
■
|
If you are using Microsoft Access or any other file based database, all users must have access to the file server where the database file resides. |
|
■
|
If you are using an SQL type database, then by default FaxPress will use the account set up by the administrator to log into the database for all users. If this log on fails, FaxPress will require each user to setup their own data source name (DSN). |
|
3.
|
If you are connecting to an SQL database such SQL server which requires a ‘Data Source Name’ (DSN) to be setup on the user’s workstation, and you have followed the above process to first setup the DSN on your (administrator) workstation and created the database connection and views. |
|
4.
|
If you are connecting to a file based database such as Microsoft Access, you need to specify a UNC path to the file such that all your users can use the same path to access the file. You also need to make sure they sufficient security privileges to access the file. You will need to provide Read/Write access to the directory where the file is located, but Read Only privilege to the file itself, since the users will not be able to change the database files, not will they be able to add entries to that phone books through FaxPress Plus. |
 You Should Also Read...
FaxPress Premier WebHelp
Last Updated: 11/1/2007
E-mail this page
|
Castelle
855 Jarvis Drive, Suite 100
Morgan Hill, CA 95037
Toll-free 800.289.7555
Tel 408.852.8000
Fax 408.852.8100
www.castelle.com
|